Competition boundary data
The following article contains instructions for the Piclo GeoPackage upload process and was last updated Aug 2023 (v1.2).
Introduction
Piclo has implemented a more precise method for how competition boundaries are defined. System operators (SOs) can provide geospatial data straight from their own systems in either GeoPackage, GeoJSON, or KML format as an alternative method to using postcodes, postcode sectors or bounding boxes utilising latitude and longitude data. This help article provides the instructions on how to use those geospatial data formats.
Geospatial Data Principles
Piclo Flex can accept GeoPackage, GeoJSON and KML files that contain one or multiple vector polygons that describe an “Area”. These “Areas” can then be used to create a competition boundary. The competition boundary is the approximate geographical extent of the constraint zone that is being tendered, and is used for visual representation on the map, and in many instances for Flex Asset qualification. Generally, these data are extracted from System Operator GIS systems.
How to upload geospatial data
The first step is to gather together the relevant geospatial data into a file in one of the accepted formats (GeoPackage, GeoJSON, KML). Piclo Flex requires that a reference be associated with each boundary/polygon. This reference is then used later when creating competitions. Geospatial data can have many reference fields for each boundary/polygon, so you must take note of the specific field name that you wish to use to reference (note: in the case of KML, this field name is generally “Name”, for other formats it can be anything).
Once the file has been obtained, there is a two-step process for defining competition boundaries (aka ‘zones’ or ‘areas’):
- Step 1 - upload a GeoPackage file via Manage > Areas. Identifying the column in the uploaded file’s attribute table that defines the unique ‘area reference’ when prompted.
- Step 2 - upload a competition file via Manage > Competitions using the area reference or references when defining the boundary in the competitions boundary sheet.
Any number of areas can be stored in Piclo and called upon via the competitions file. This means a SO can upload accurate polygons of all their primary and / or secondary substation feeder areas in one go, and then call on any number of those polygons to create unique competition boundaries time and time again. A competition boundary can consist of multiple ‘Areas’ each specified by an area reference.
As boundaries may change over time as new connections are made, it is possible to re-upload areas with the same reference as a previously uploaded area. When this happens, a new record of the area is created with the updated boundary. It is only necessary to do this when the boundary has changed.
Note: Historic (i.e. previously uploaded) competition boundaries are not updated when areas are updated. If this is required, please contact support.
Restrictions
- Area ref character limit: 50
- File size limit: 5MB
- Only add 1 layer per file
Working example
- Go to Manage > Areas
- Upload a geopackage file, with an attribute column named "NR"

- With the information in that column, the areas are referenced as “340011”, “163170”, “340012”, and “340017” etc.
- Via Manage > Competitions. upload a Competition File and within the competition boundary sheet, add the references “340011” and “163170” and then just “340012” in the “Area Refs” column against each competition as required.
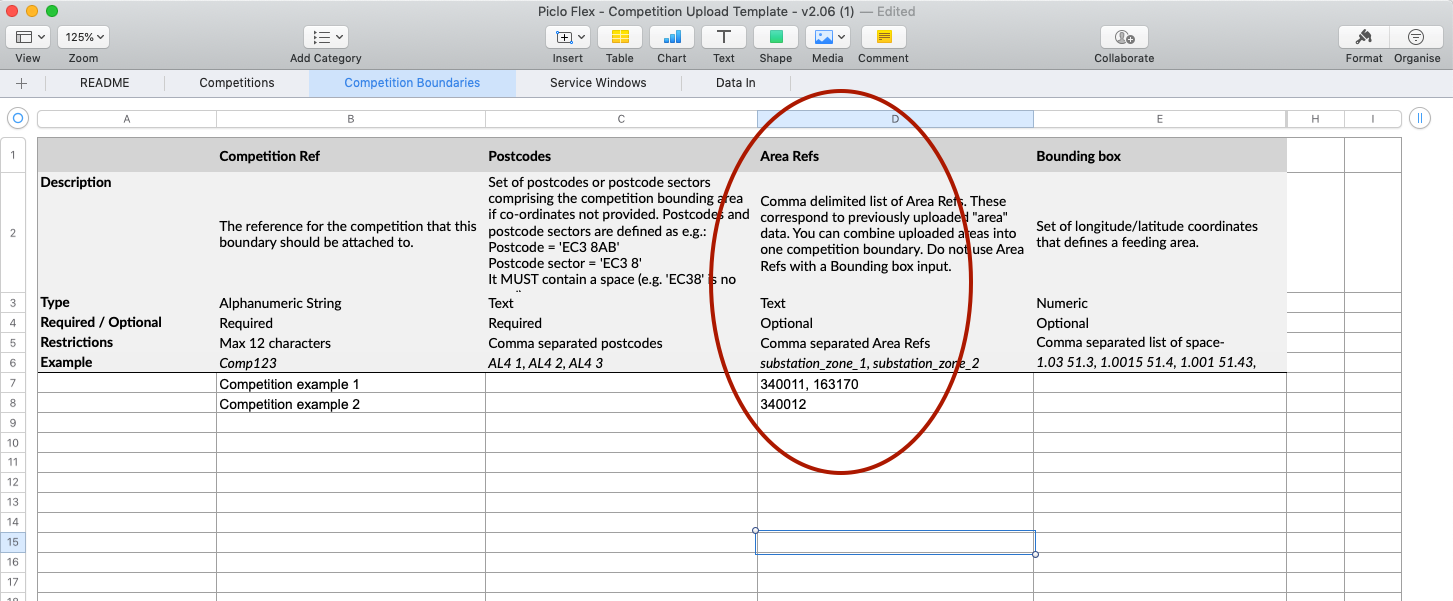
- This will create a competition with either the union of two areas, or as a solo area, as defined in the GeoPackage file previously uploaded.
How to view and edit shape attributes in a GeoPackage using QGIS
QGIS is an open source GIS (Geographic Information System) software that can be used to view GeoPackages and their attributes. To do this, follow these steps:
- Open QGIS
- Open the Data Source Manager (Layer -> Data Source Manager)
- Select GeoPackage in the right hand column of the dialogue box that comes up
- Select “New” to create a new connection
- Select the GeoPackage file, then select “Connect”
- It will then populate a list of “tables” in the GeoPackage- all tables will need to have the reference attribute.
- Select the table you want to see the attributes to and then click “Add” at the bottom of the dialogue.
- Close the dialogue and then right click the new added layer in the “layers” box in the bottom left of the screen.
- Select “Open Attribute Table” on the right click menu.
- Complete - now view and edit the attribute table.
IMPORTANT NOTE REGARDING GEOPACKAGES: Editing a GeoPackage file in QGIS or any other software will write-lock it for other applications. After creating the GeoPackage, make sure to either close the GIS application or remove the application’s connection to the GeoPackage before uploading the file to Piclo. If the filesystem has a copy of the GeoPackage file with “-wal” appended, this is evidence that the file is write-locked.